Pages
A page is a customizable screen where a variety of visual objects can be arranged on a grid:
- tags and their labels
- documents
- dynamically computed values (as tag-based expressions)
- images and texts
- geometric shapes
- various HVAC devices, etc.
HMI only functions as a page viewer. For general management of pages, see interface of the Portal; for page creation and/or editing, see Introduction to Page Editor.
Navigation
The left pane lists all user-accessible pages in their respective directories as arranged under Portal » Projects » General » Pages. Searchbar atop provides limited search functionality.
If any page is marked as favorite, the list will be split into two collapsible sublists: FAVORITES and ALL. To mark a page as favorite, click . Click on next to a favorite page to rename it or remove from favorites. Note that this rename will only be visible in the FAVORITES list.

View controls are located in the upper right corner of the content pane. Use and , or the mousewheel to zoom in or out. Use , , , and , or drag to move the viewport. Use to center the viewport and/or reset the content pane to the default scale, at which the entire page fits the viewport boundaries.
Page tools
header contains the most complete toolbar of any section. Some of these tools provide shortcuts to objects that are specifically linked to on this page but can also be found in their respective sections elsewhere in HMI. The following tools are available:
Page Info
Opens the page description if there is any; greyed out if there is none. Description is shown in the user’s preferred language if available, else in English.
Print Page
Opens a dropdown menu of print formats (only A3 and A4 are supported) and generates a printable snapshot of the page with the current values.
Share Page
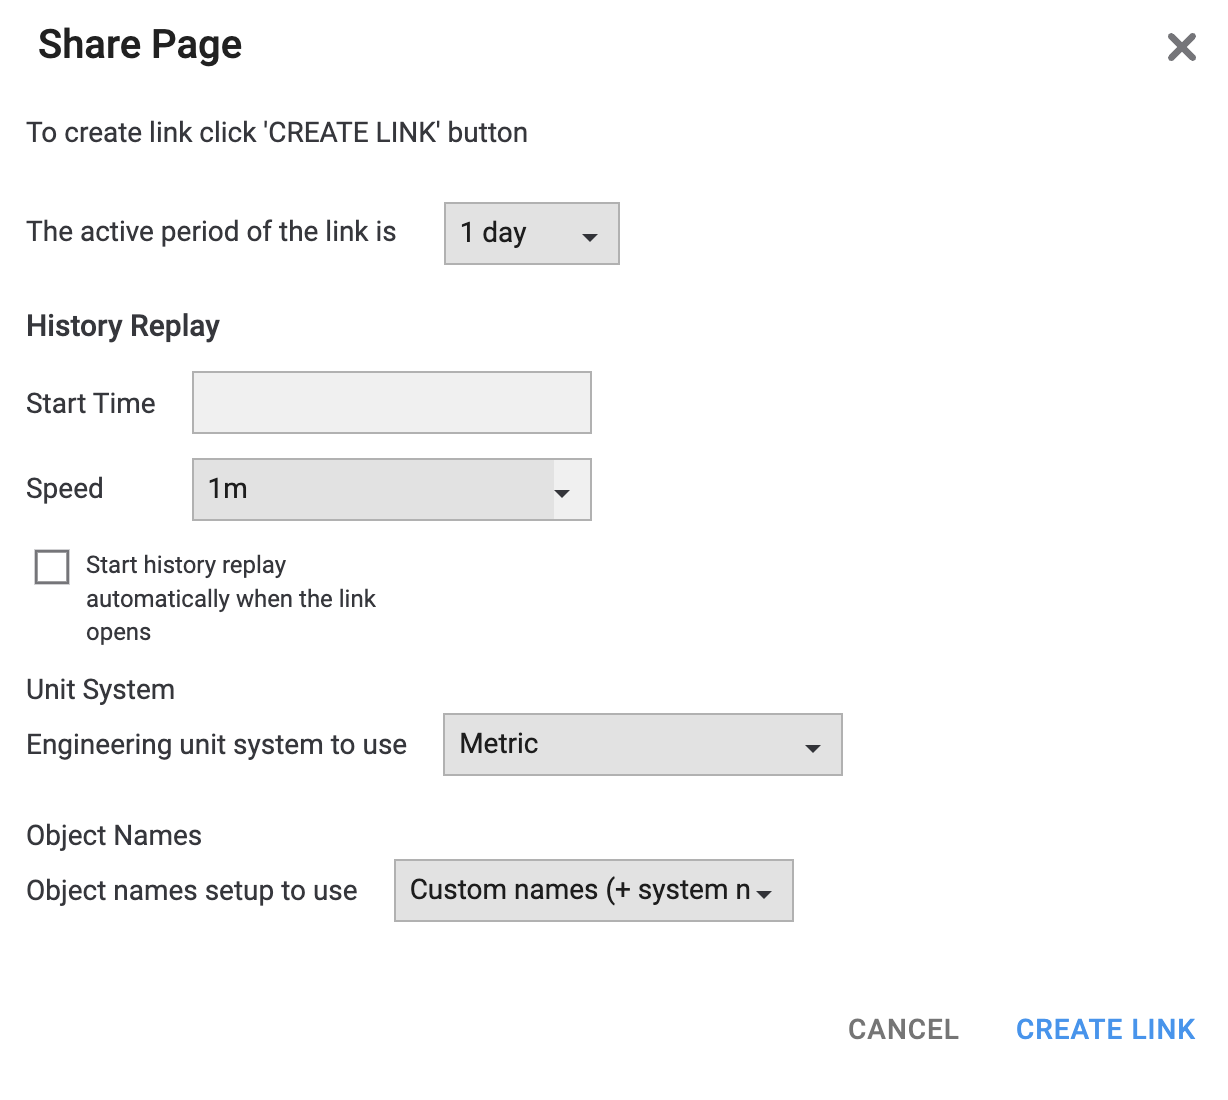
Opens the dialog below:
To share the page:
- Choose when the link should expire: after one day/week/month/year or never ("forever").
-
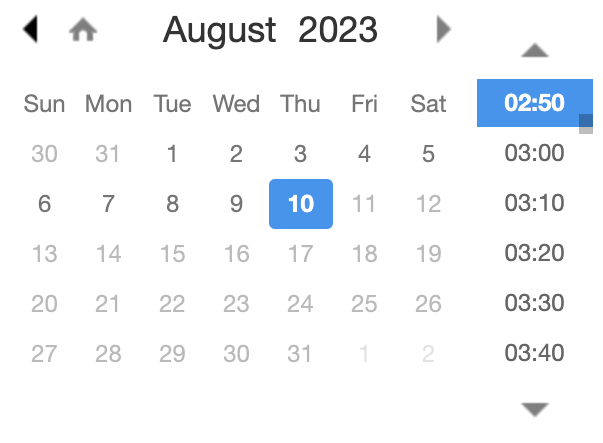
Choose the start time and speed for replay (see Time Replay). Date and time can only be picked retrospectively at 10-minute intervals, although more precise values can be entered manually. Click to set the current date and time.
Check the box below the speed selector to start history replay as soon as the link is opened. - Choose the unit system: metric (default) or imperial.
- Choose the preferred naming conventions.
Links to shared pages are always anonymous. Anyone with the link will be able to access it. For security concerns, pages are only shared in view mode.
View Trend Groups
Opens a dropdown menu of shortcuts to the page’s Trend Groups. Note that an existing trend group is not necessarily linked to the page. While Trends contains all of the existing trend groups, the menu will only list those that have explicitly been added to the page in Introduction to Page Editor. If the page does not have any associated trend groups, the button will be greyed out.
View Documents
Opens a dropdown menu of shortcuts to the page’s documents. Note that a document uploaded to the project is not necessarily linked to the page. While Documents contains all of the project’s documents, the menu will only list those that have explicitly been added to the page in Introduction to Page Editor. If the page does not have any associated documents, the button will be greyed out.
Manage Tag Values
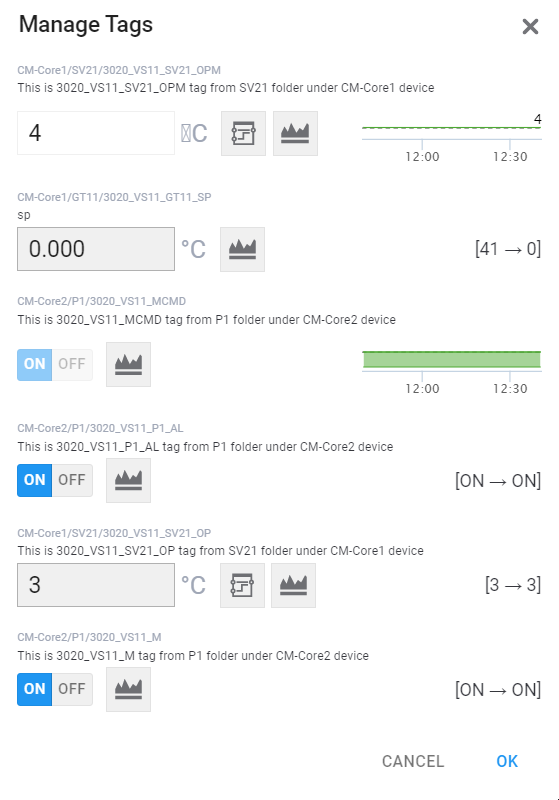
Opens an interface for tag interactions. Only tags present on the page are shown; to interact with tags from elsewhere, use Tag Lookup.
dialog has the following UI elements:
-
Full path to the tag, including its name. -
Tag description, if it has been added in Tag Editor. By default, the description may be partly hidden; click on it to show the full text. -
For a writable tag, enter target value here and press ↵; the field is locked for non-writable tags.Non-writables have a white background.
-
Opens curve editor (regulator tags only). This tool controls the output tag value and is useful in situations when an external factor affects an internal parameter. Per Energy Machines™ terminology, a source tag defines the value of an output tag. A regulator curve visualizes the way the source tag impacts the output tag.The editor is a bi-axially limited area where each point correspond to a pair of tags (X for source tag, Y for output tag). Drag the points to configure the curve. The orange lines correspond to the values while the coordinates of the crossing point show the current value pair.
Alternatively, opens the page linked to this tag under Type in the editor.
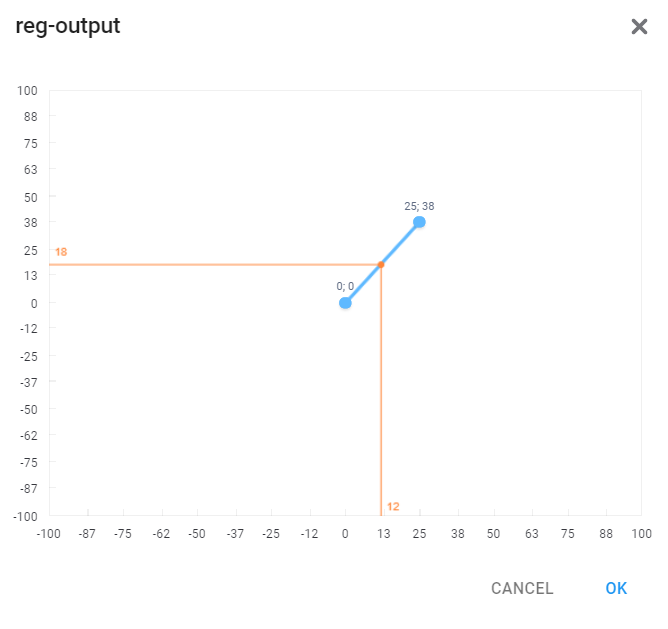
Fig. 1. Curve editor
-
Shortcut to the tag's history in Trends. -
Graph of the tag's values in the past 2 hours (readable tags only). Hover over the graph to see values at specific points. -
Shows the latest change to the tag (writeable tags only).Server restart registers a change in tag value even if the value persists, in which case the interface will show identical values before and after.
-
Toggles the value of a boolean tag; the switch is locked for non-writable tags.
Events
Opens a dropdown menu of events that involve the tags on this page.
Create Trend Group
See also: Trends/Trend Groups for details.
Opens trend group creation dialog:
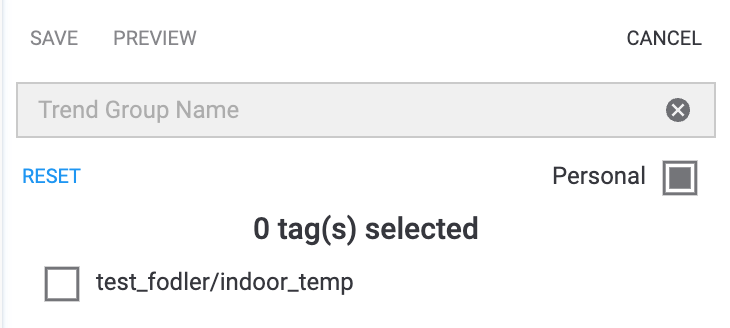
- Select the tag(s) to add to the trend group.
- Check to make the trend group only visible to the current user.
- Enter the group’s name.
- Preview and/or save the group.
deselects all tags; closes the dialog without saving the group.
Creating a new trend group here will not link it to the page itself; to do that, use the Introduction to Page Editor. However, the new trend group will appear under Trends.
Tag Lookup
Opens a tag selection interface; selected tags can be interacted with in the same ways as under tag management; however, tags accessible in this tool are not limited to those added to the current page.
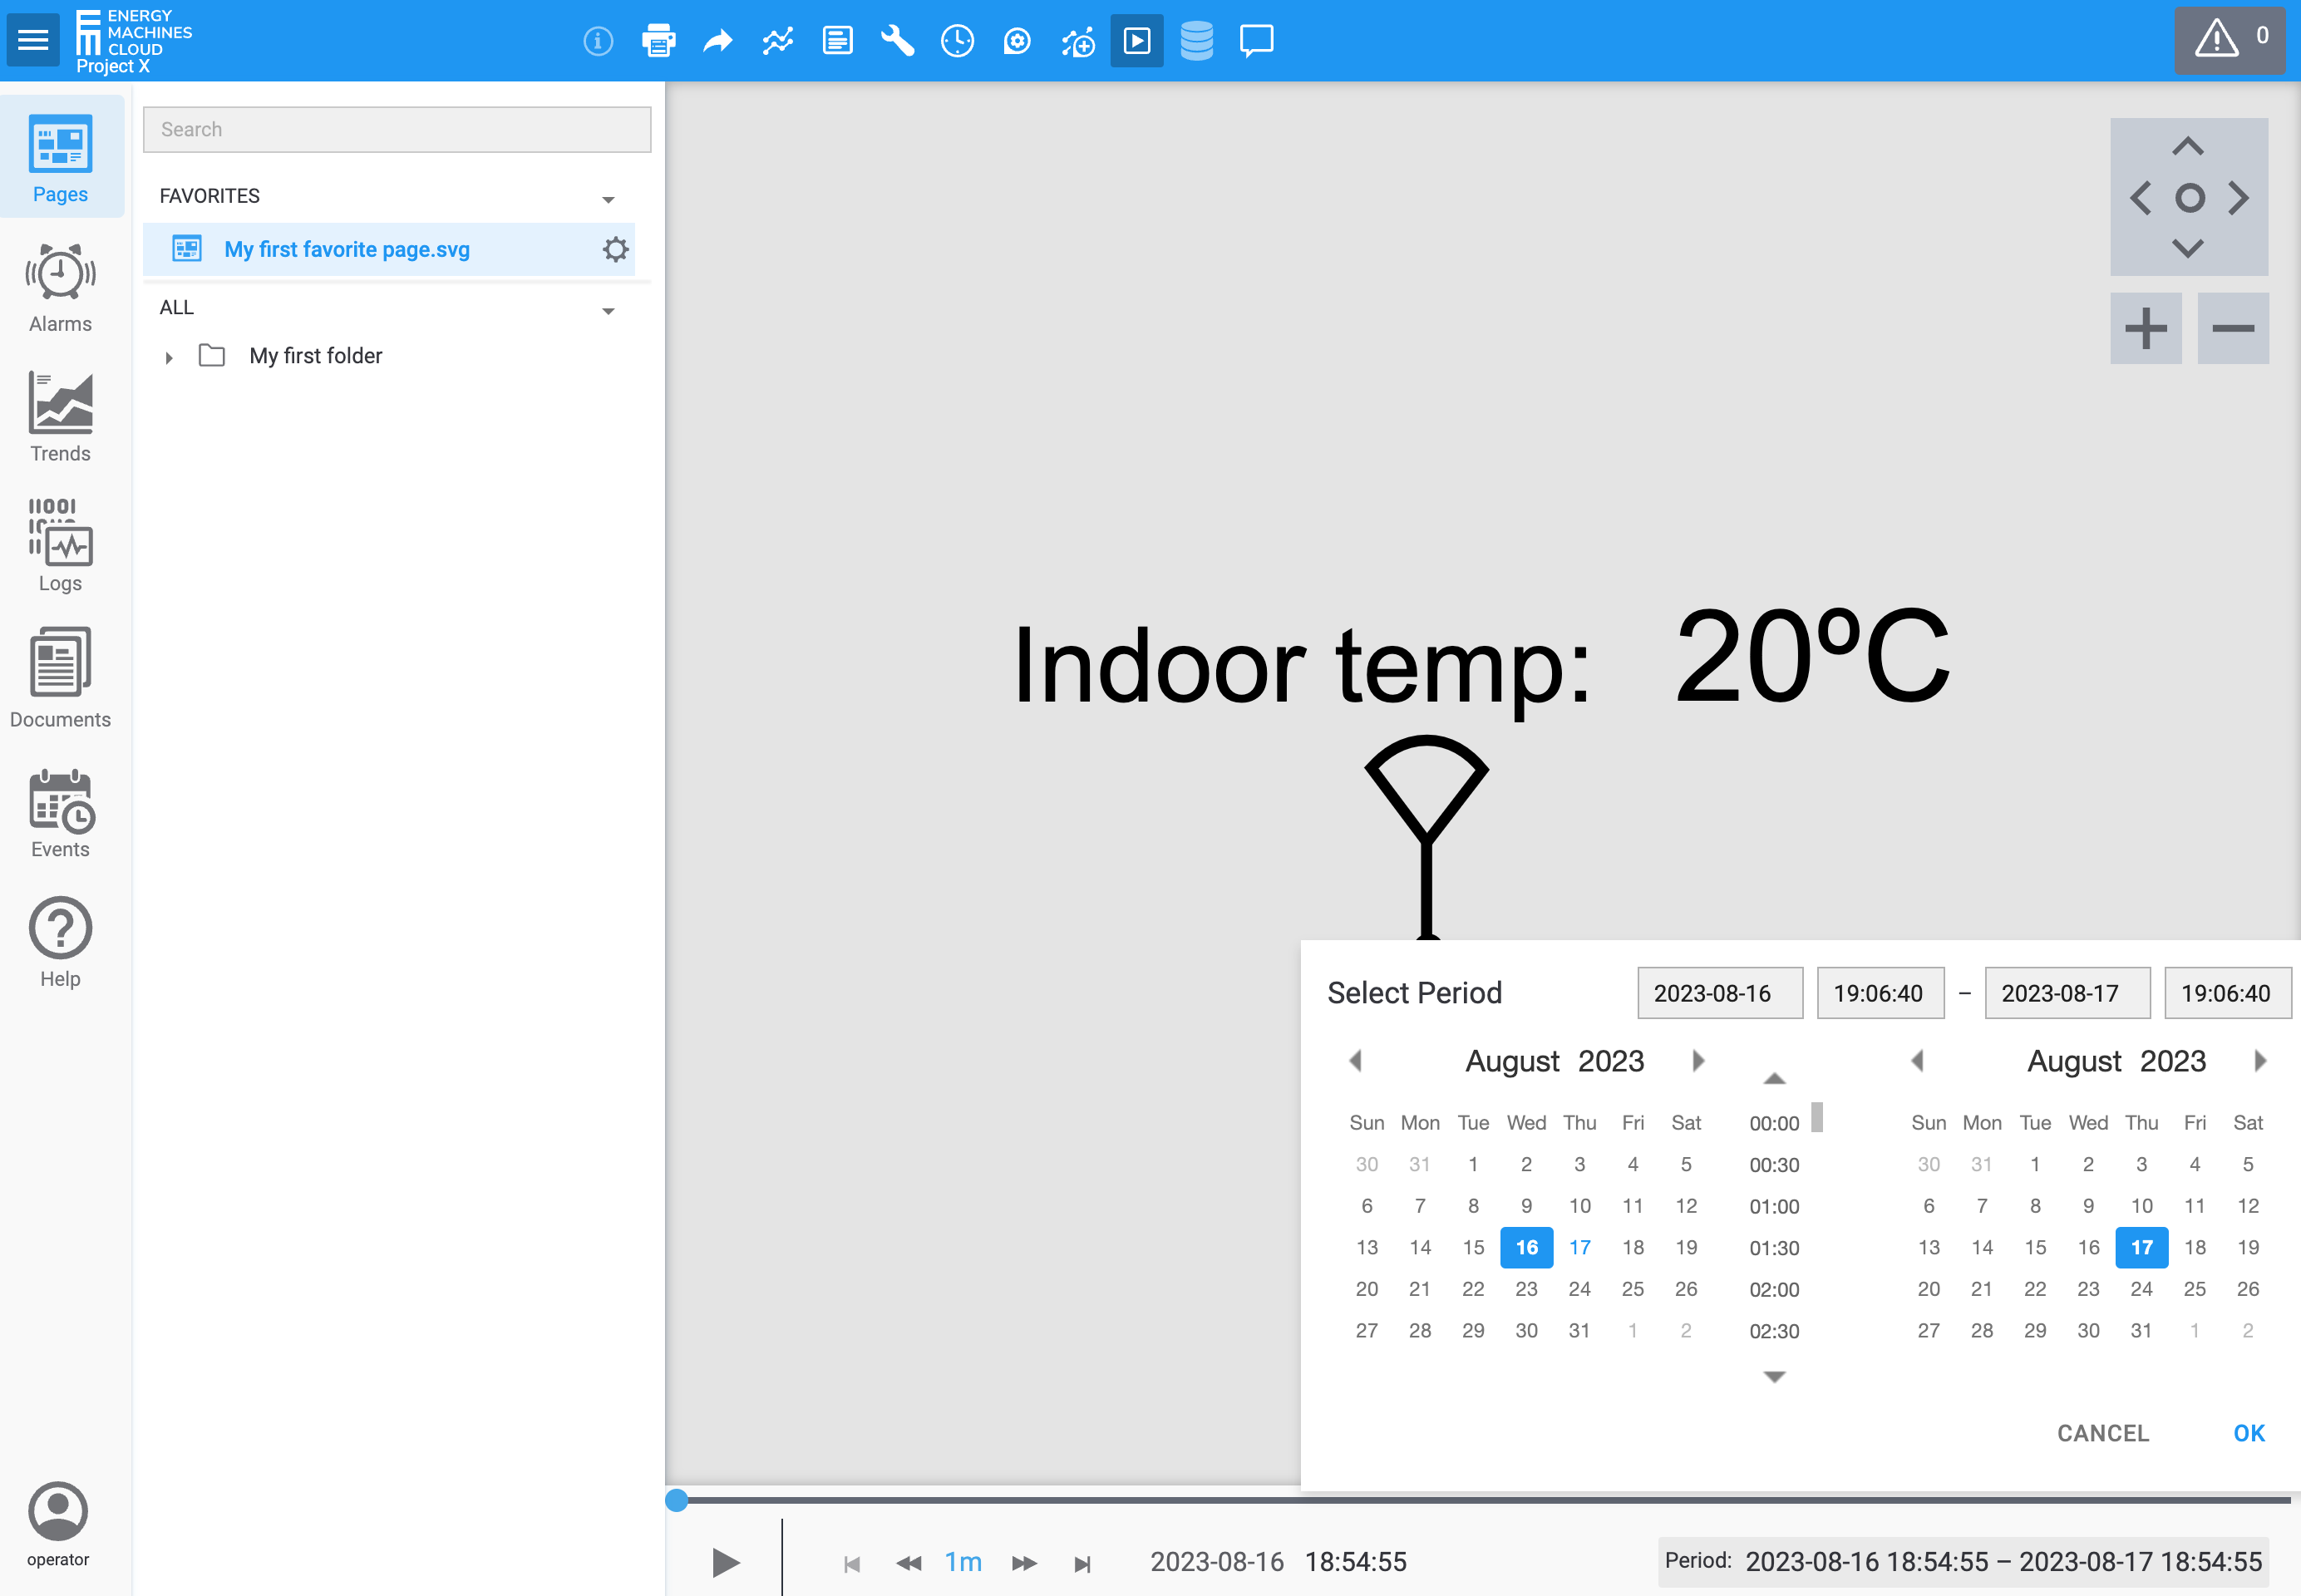
Time Replay
See also Alarms
Visually reproduces historical tag values.
-
- ,
Start or pause replay - ,
Move the playback position back or forth by an increment equal to the value - ,
Decrease or increase -
Length of historical timespan collapsed into one second of replay (1m by default). Click to select another available value from the list:1s 2s 5s 10s 1s 30s 5m 15m 30m 1h 1d 1w 1mon Clicking after selecting a value from this list sets the speed to the maximum (1mon).
- ,
-
Date and time of the currently shown state of the page. Progress bar above shows the playback position with respect to the replay timespan. Click on the bar or drag the position marker to set the position to a particular timepoint. Note that the playback position is not scrubbable by any means. -
Period shown in the replay; set to cover 24 hours up to the current moment by default. Click on the datetime picker to change the timespan; note that either point can only be picked at 10-minute intervals although more precise values can be entered manually. -
Tags can have colored outlines as explained below:- Yellow outline renders for as long as the tag had a manually written value and disappears at the moment of setting the manual override to false.
- Red outline renders for as long as an active alarm involved the tag: flashing while unacknowledged and static otherwise. It disappears at the moment of shelving or resolving the alarm.
Choose Data Source
This feature is a work in progress and is disabled for most users.
View page comment
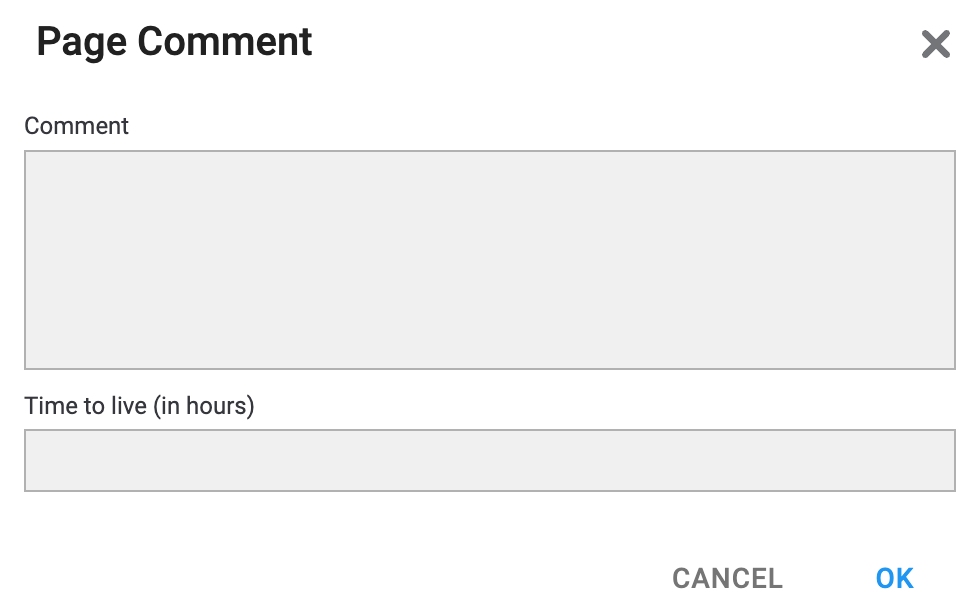
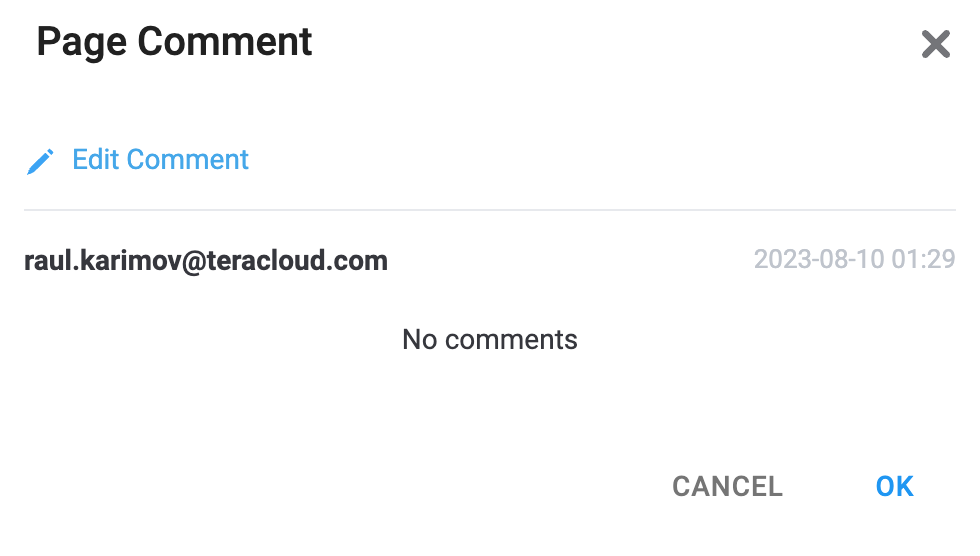
Opens a comment popup. Expiry can be set by entering the comment’s lifetime in the lower field (not required). An expired comment will have no text, but its author and timestamp will still be visible (see screenshot to the right).
Comments are visible to all users with access to the page in HMI.