Project Profile
Project profile consists of several tabs depending on the user’s role. Tabs also link to further subsections of the profile. Breadcrumbs below the Portal’s top bar allow to go from any subsection to any higher-level view all the way up to Projects.
Project’s pictogram and link to its HMI are shown to the left. These are shown in all tabs. Pages listed below describe each a tab of the profile:
General
This tab presents the following information about the project:
- Project name
- Project ID (click to copy the ID value)
- Scale flair (small, medium, or large)
- Address
- Project type
- Groups that the project is a member of, see Groups for details
- Server that hosts the project and its IP address (hidden by default). Server name is also a shortcut to the server's page under Servers.
Pages
Main article: Pages
A page is an interactive screen that presents selected information on its related project. This information may include sensor readings, schematics, or other visualizable data. Pages update in real time where applicable.
This subsection lists all available pages of the project. Each page has a name and date created. Select a page to download it as a file1 or create a template based on it. Alternatively, a template can be created by clicking on to the right.
Documents
Provides access to the PDF documents shared by other users of the project. Documents can be arranged into folders and subfolders. Items are sorted alphabetically, starting with folders.
The following tools are available to project administrators and managers in the header toolbar:
-
Creates a new folder. -
Opens the dialog for importing a single document, with the following options:-
Name under which the document will be stored; autofilled with the filename when uploading locally. -
-
Import by file— Allows to drag-and-drop or browser the local computer for a file. -
Import by link— Allows to paste the direct URL of a document hosted online.
-
-
-
Opens the dialog for batch import of documents by uploading aziparchive.
Filter field below the toolbar provides basic search functionality. Below the field is the bulk actions toolbar, which features the following:
-
Checkbox; selects/deselects all items at the current location. -
If nothing is selected, counts all folders and/or documents (referred to as “files”) at the current location; if any item is selected, counts selection only.
Select at least one item to reveal the available bulk actions:
-
restrictedRequires administrator or manager privileges under the project; see Permissions.
Deletes the selected folder(s) and/or file(s). -
Downloads the selected item(s). If the selection contains more than one PDF document, downloads a.ziparchive. -
restrictedRequires administrator privileges under the project; see Permissions.
Opens a dialog where the selected item(s) can be moved to a different location (e.g., from a folder to the root). -
restrictedRequires administrator privileges under the project; see Permissions.
Opens the dialog, which has two collapsible lists:-
Lists all users -
Lists all user groups
with access to the project. Slider to the right of each listed entity determines if the user will be able to access the selected document(s). Folder-wide access affects all of its documents and subfolders.
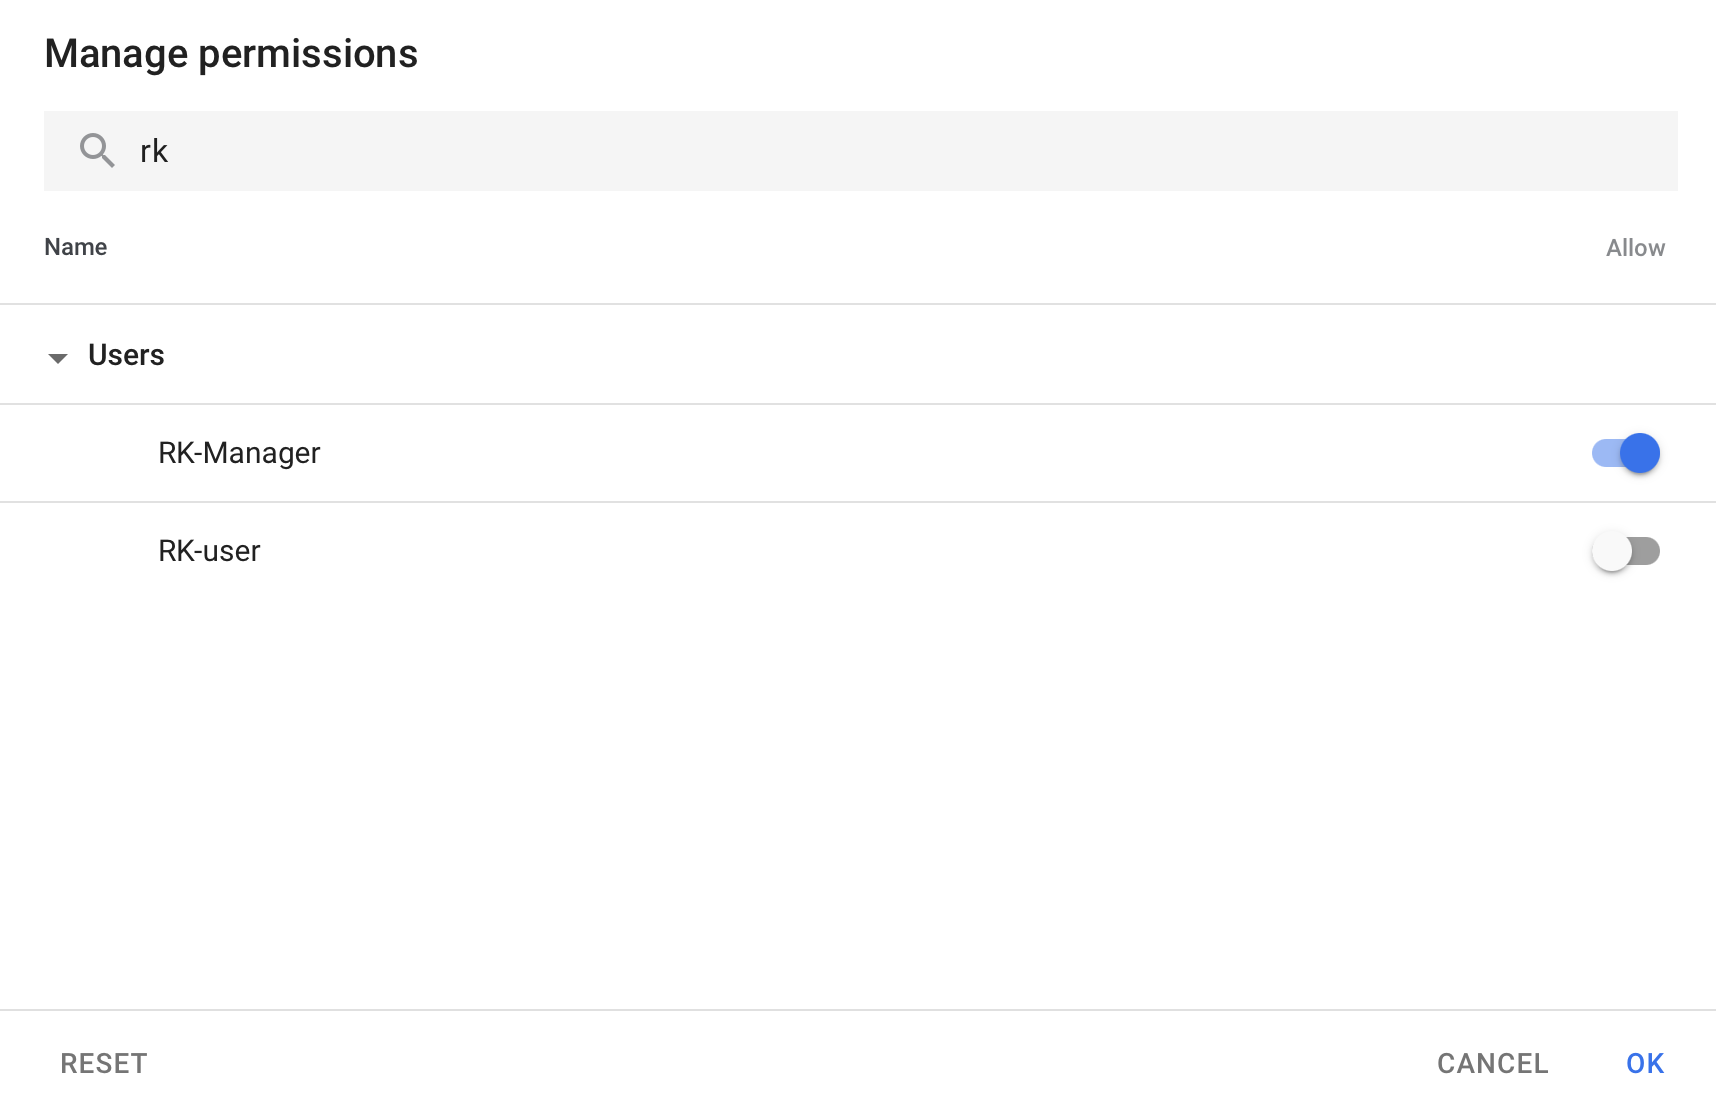
Fig. 1. With these settings,
RK-managerwill be able to access the affected document(s), butRK-userwill not.The following restrictions apply:
- Users with viewer privileges can only see the items they are granted individual access to, whether on the Portal or in the HMI.
- Administrators and managers can view any items on the Portal. Nonetheless, individual access must be ed for the items to be visible in the HMI, even to the uploader.
-
Click on in any item’s pane to reveal its options:
-
Renames the folder or document. - , , and behave identically to the eponymous bulk actions but only affect one item at a time; same privilege-based restrictions apply.
Tags
Main article: Tags
Alarms
Main article: Alarms
Preferences
Main article: Preferences
Third-Party settings
Main article: Third-Party Settings
KPI
The KPI tab is a list of KPIs associated with the project. You can associate project tags with KPIs, if you have project administrator credentials.
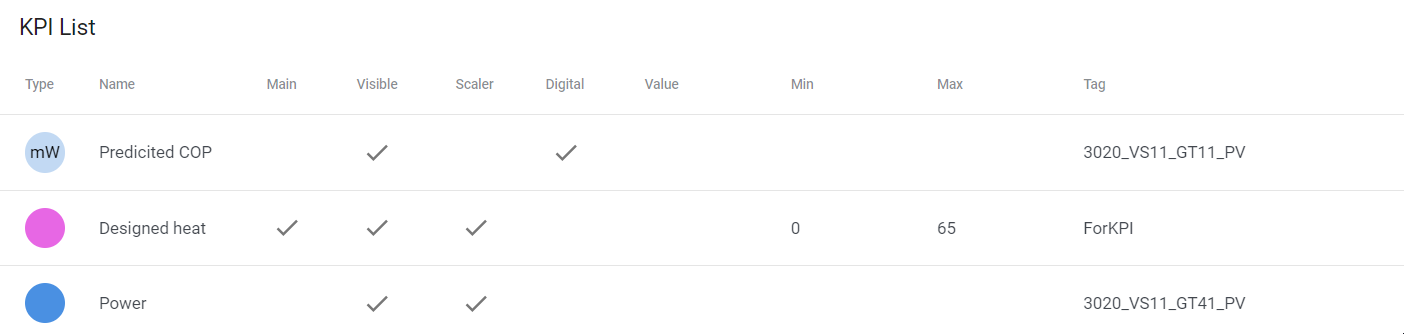
Fig. 2. Project KPI tab
A KPI is an essential performance parameter defined by the project type. KPIs display the associated tag values that project or Portal administrators can configure in the KPI tab of the project profile.
You can associate a tag with each KPI in the editing mode. Click on to pick a tag from a page. It is possible to choose the tag in the tag list: click on for that.
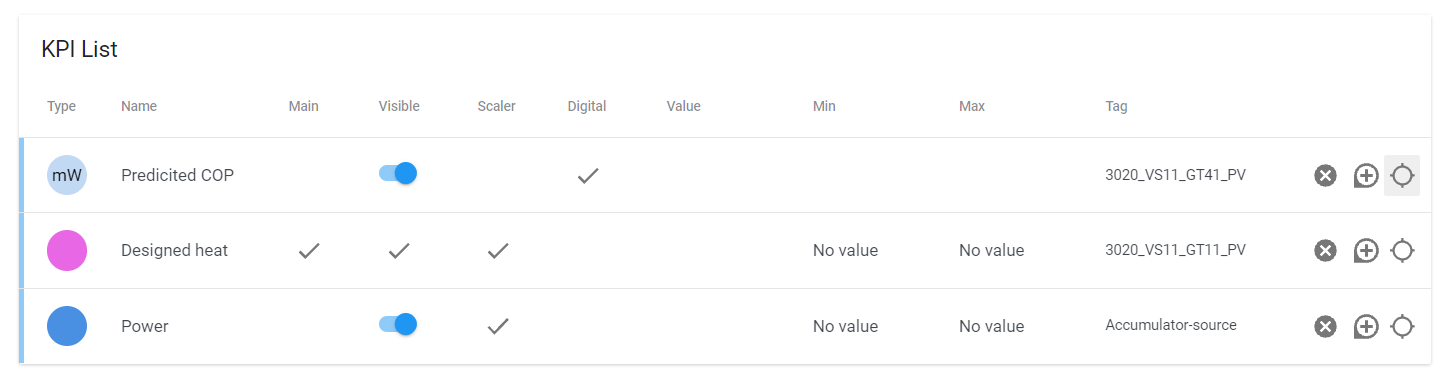
Fig. 3. You can change visibility of some KPIs and associate tags with them.
KPIs in Portal help you to monitor important information about projects. Each view of the Projects section displays KPIs differently.
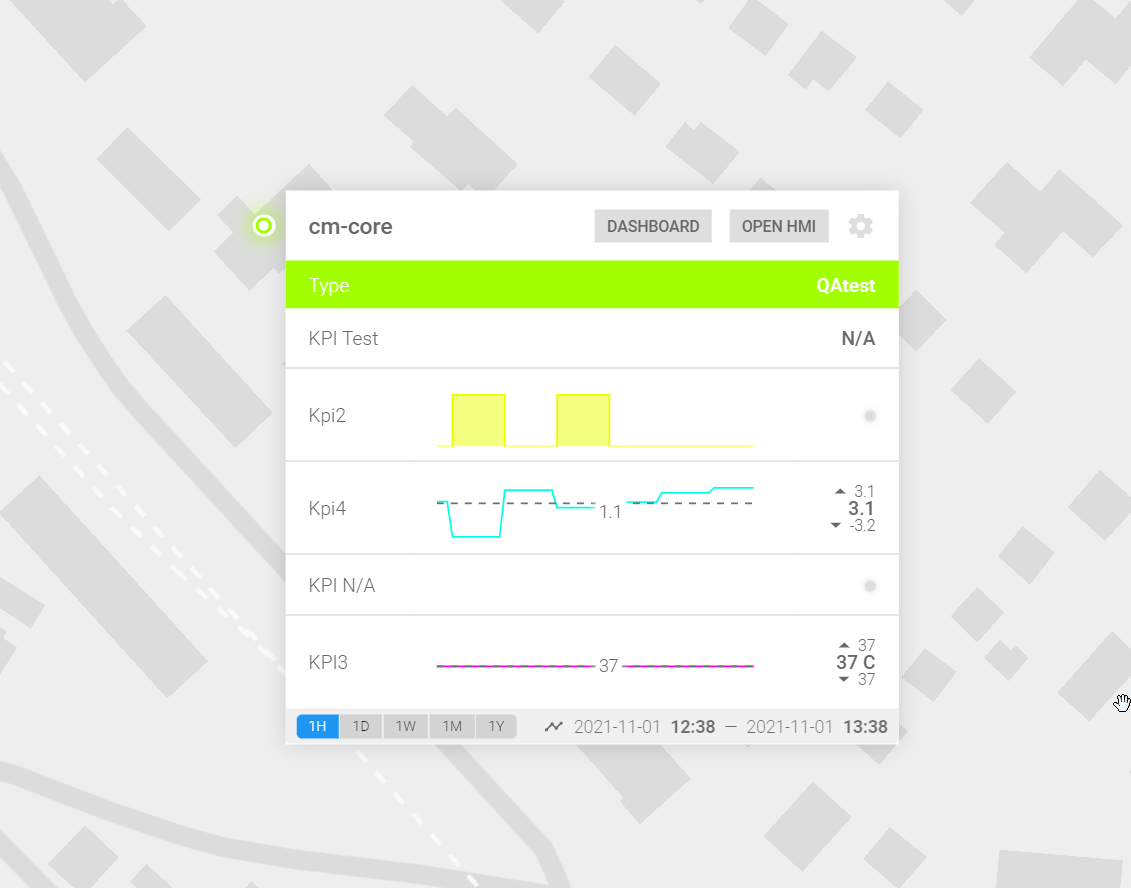
Fig. 4. Click the project's marker to expand the KPI pop-up in the view
The KPI pop-up also contains redirecting buttons that allow you to open an HMI instance and an external dashboard. You can change the display periods if tags associated with KPIs have historical data. The buttons are placed at the bottom of the KPI pop-up, as in the figure above.
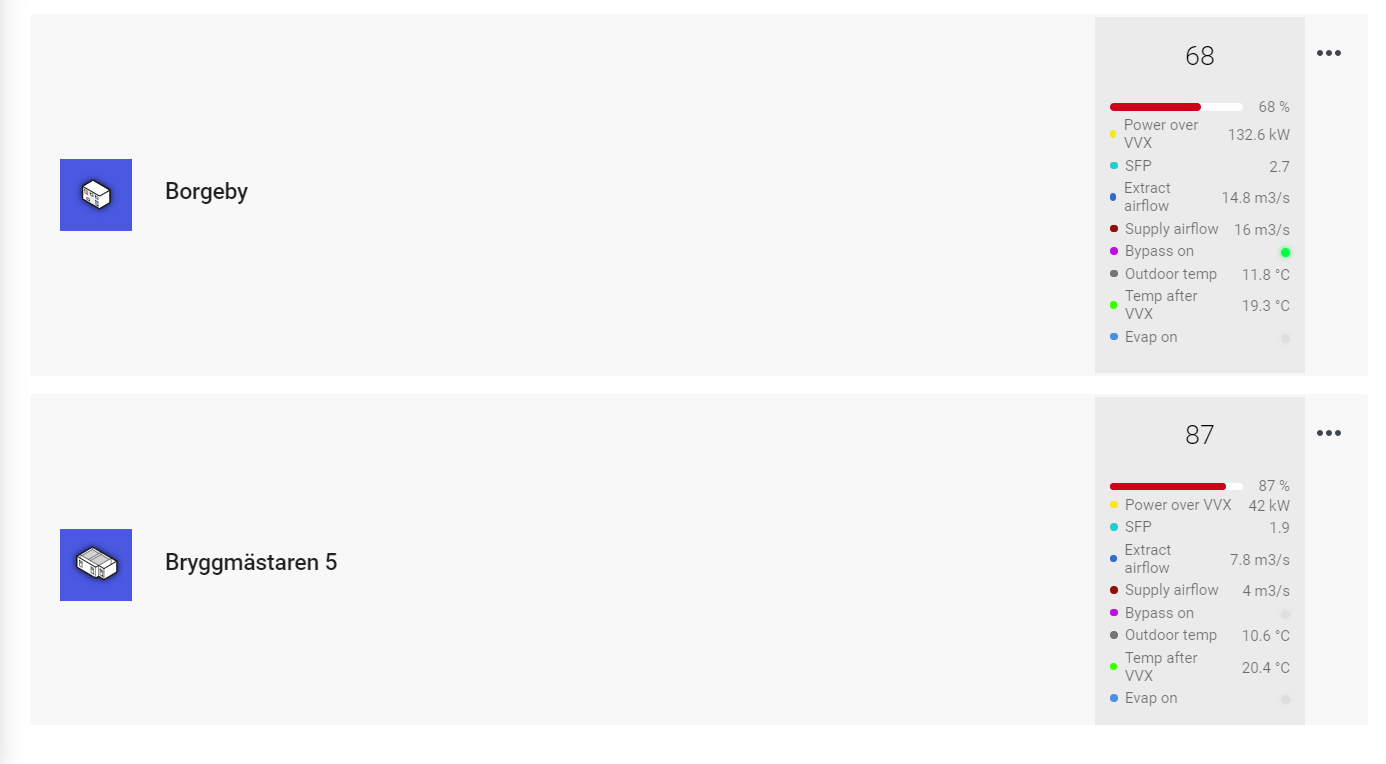
Fig. 5. The view places KPIs on the right side of the screen
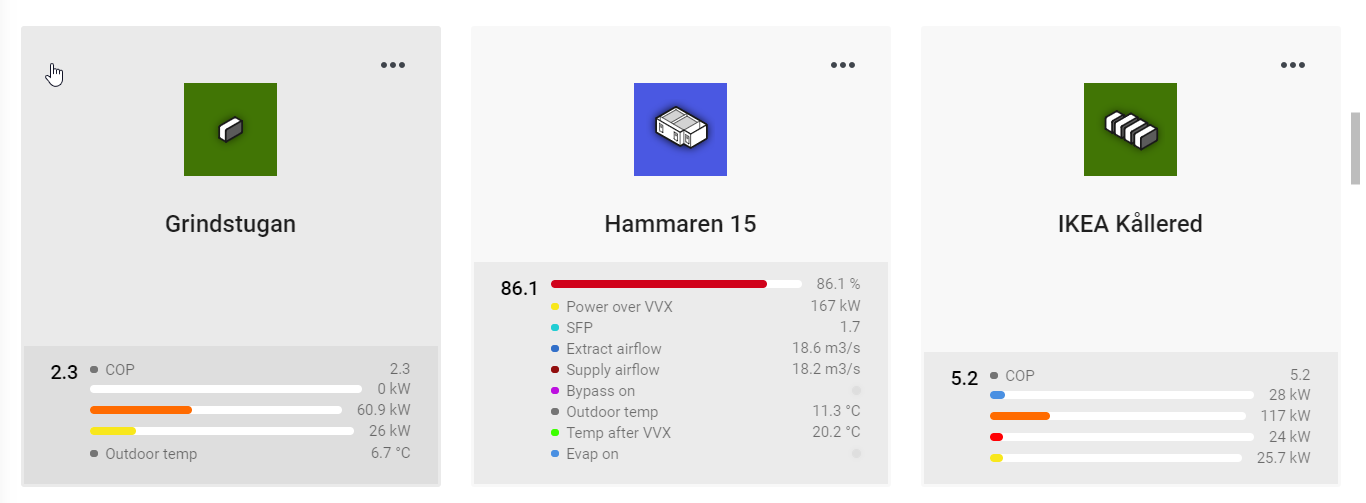
Fig. 6. In the view, you can find KPIs under the project name
Dashboard
This section overviews a feature that is currently in development and might not yet be available in the stable release version.
To create a dashboard, navigate to → → . A dashboard may consist of several pages which consist of up to four different components per page.Components
- Text components:
- Title component: Short, up to 50 characters long title
- Description component: Up to 250 characters long description about your project, chosen widgets etc.
- Widget components:
- Bar chart widget: As a default offers “Efficiency” chart to be displayed.
- Bubble chart widget: As a default offers “Savings in CO2 emissions equivalent” chart to be displayed.
- Line chart widget: As a default offers “Savings on building’s operation” chart to be displayed.
- Pie chart widget: As a default offers “What is powering this bulding?” chart to be displayed.
All components are editable and adjustable to your project(s) needs.
Single Project Dashboard
Suitable for users who have only one Energy Machines™ project (or only one project needs a dashboard):
- Click on to open the dashboard wizard. Enter the desired name, choose a project, and click .
- Proceed to type the page name and choose a layout for the first dashboard page, then click again.
- Now choose the components and upload an icon for your first dashboard page. Once ready, you can either or if the dashboard needs no more pages.
Multi Project Dashboard
By choosing this option under Dashboards, you will be able to add information about your multiple projects into one dashboard. Compare, highlight, display different aspects of your projects!
Permissions
Permission levels determine actions available on a per-user basis. Permissions can be granted and revoked only by project administrators.
The following actions are available for different permission levels in ascending orderEach subsequent level provides all privileges of the preceding levels.:
Portal
- Viewer
- View the project profile, including its KPIs and preferences.
- View, create/edit, subscribe to, and delete Reports (Shared Reports are view-only).
- View devices/tags and copy their IDs.
- View and export pages and documents subject to individual permissions, see note below.
- View alarms and copy their IDs.
- Manager
- Perform basic management:
- create/edit
- import/export/download, copy IDs of
- rename/move/delete
- Edit project preferences.
- Rename and delete Shared Reports.
- Perform basic management:
- Admin
- Edit the project profile, including its KPIs and preferences.
- View and edit the project’s Third-Party Settings.
- Manage the individual permissions applicable to:
- Pages
- Tags
- Documents
- Alarms (via Categories)
Project viewers can only see pages and documents when granted respective permissions on a per-item basis; see:
- Manage permissions for page-related permissions.
- Documents for document-related permissions.
HMI
- Viewer
- Operator
- Write values to tags configured to take user input, if explicitly allowed to do so.
- Create public trend groups, make private trend groups public.
- Schedule events.
Regardless of the role in the HMI, the following restrictions apply:
- Any page or document can only be viewed in the HMI by the user(s) explicitly granted access to it, see note above.
- Alarms have three levels of access. For each alarm category, access level is set individually for each user or user group, see Category Permissions.
Any user must be able to access at least one page as configured under page permissions, in order to be able to use any tag-related tools.
Table below provide a quick summary of individually assigned permissions:
Table 1. Individual permissions on the Portal.
| Role | Allowed? | Portal | HMI |
|---|---|---|---|
| Viewer | Yes | View | View |
| No | None | None | |
| Manager | Yes | + Create, edit, delete | View, export |
| No | See above | None | |
| Administrator | Yes | + Manage permissions | View, export |
| No | See above | None |
These privilege-based restrictions apply to pages and documents.
Table 2. Individual permissions in the HMI.
| Role | Access level | HMI | Portal |
|---|---|---|---|
| Viewer | Allow | View, write | Depends on the Portal role. |
| None, Forbid | View only | ||
| Operator | None, Allow | View, write | |
| Forbid | View only |
These privilege-based restrictions apply to tags. Privileges applicable to alarms can be granted by a Portal administrator to each individual user or user group, regardless of their role in the HMI, on a per-category basis, see Category Permissions.
Anonymous Local HMI user
Local HMI instances can have a user that does not have an email registered in the Energy Machines™ system. Such user is called anonymous.
In the Permissions tab’s editing mode, click on and type anonymous in the filtering field. Appoint a role for the anonymous user. After that, you can manage permission concerning pages, documents, tags and alarms via the contextual menu.
Mobile
Each user that has at least mobile viewer access to a project will see the KPI assigned to that certain project. A user with the right access can modify the projects mobile view of certain project tags. In case more tags are wanted to be viewed in the app, these are added in the portal under the tab.
Animated screenshot below shows how to modify the custom tags and removing one of the custom tags, EMB01/EMB_EM1_Power. The modifications are done in the Portal but will be visible in the mobile application.
Fig. 7. An example of how to modify personal mobile tags.

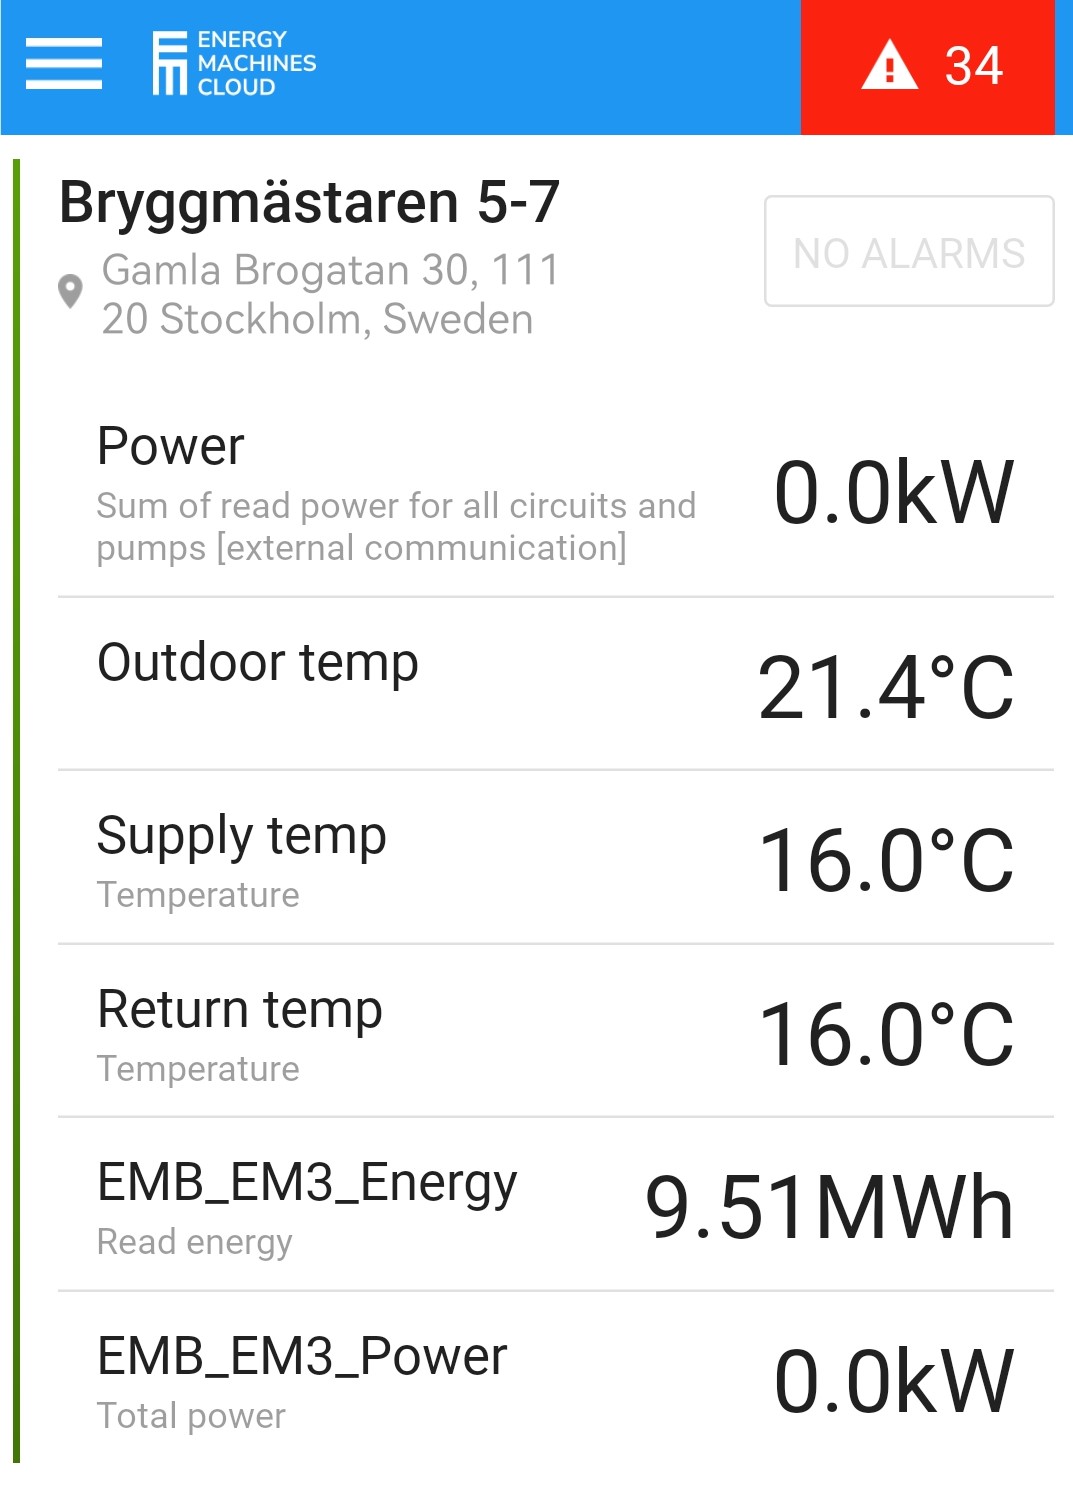
Figure to the left shows what the user would see in the app before the custom tag has been removed from the Portal. Figure to the right shows what the user would see in the app after the custom tag has been removed from the Portal. The tag EMB01/EMB_EM1_Power is no longer visible in the app.
This action downloads an SVG copy of the page’s graphics but none of the applicable data. ↩